TL;DR
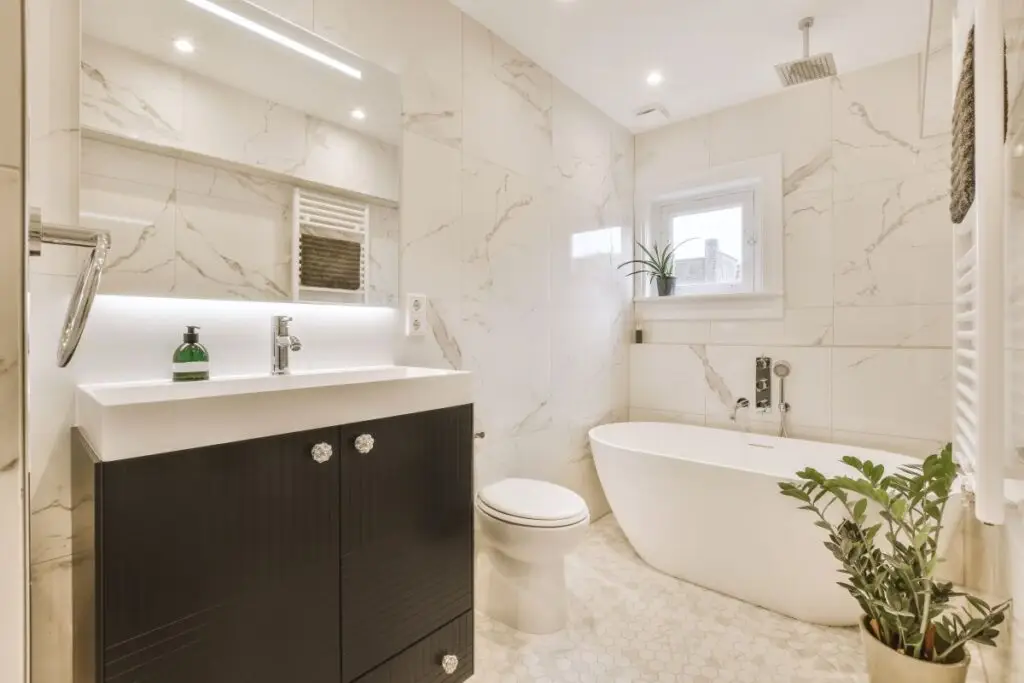
For a full bathroom floor tile replacement, the toilet must be removed. Tiling around an installed toilet creates gaps, uneven cuts, and a compromised seal at the flange, which leads to leaks, mold, and failed inspections. The only acceptable scenario for replacing tile with the toilet in place is a single-tile repair located away from the toilet base, where the toilet flange and surrounding tile remain undisturbed. DWR Interiors removes and resets the toilet on every full bathroom tile installation in Spring, The Woodlands, Conroe, and greater Houston.
In this blog, we’ll discuss the best methods for replacing tiles around a toilet, when it might be necessary to remove the toilet, and how to achieve the best results.
Can You Replace Bathroom Floor Tile Without Removing the Toilet?
For any full or partial floor tile replacement that reaches the toilet, the answer is no. The toilet has to come out. Tile must run continuously underneath the toilet base and up to the flange so the toilet sits on a finished, sealed floor at the correct height. Working around an installed toilet forces tile cuts that never seal properly, leaves gaps that absorb moisture, and creates conditions where the wax ring fails earlier than it should.
This is not a corner-cutting judgment call. It is how tile is installed correctly in residential bathrooms.
The Only Exception: A Single-Tile Repair Away from the Toilet
There is one narrow scenario where you can replace the tile without removing the toilet. If you are repairing a single cracked or loose tile that sits in a location not adjacent to the toilet base, you can lift that one tile, prep the subfloor underneath, and set a replacement tile without disturbing the toilet at all.
That scenario looks like this:
- One tile is damaged in the middle of the floor or near a vanity
- The toilet base, the surrounding grout lines, and the flange seal are not affected by the repair
- No subfloor work is needed
- No adjacent tiles need to be lifted
If the damaged tile sits next to the toilet, butts up against the toilet base, or is part of a row that runs under the toilet, the repair has crossed into territory where the toilet should be removed. The same applies if more than one tile is being replaced.
For homeowners wondering about the cost of more extensive bathroom renovations, including plumbing updates, our detailed guide on What is the average cost of a bathroom remodel in Texas? offers valuable insights.
Why Tiling Around an Installed Toilet Fails
Working around the toilet looks faster on paper. In practice, it creates four problems that cost more to fix than removing the toilet would have cost in the first place.
1. Tile cuts around a curved toilet base never seal correctly. The base of a toilet is a compound curve. Cutting tile to match that curve while the toilet is bolted in place leaves gaps that get filled with grout or caulk and eventually break down. Moisture finds those gaps and works its way under the tile.
2. The flange height ends up wrong. The toilet flange should sit flush with or slightly above the finished floor. When tile is installed around an existing toilet, the flange stays at the old floor height, which is now below the new tile surface. That mismatch causes wax ring failures, leaks, and rocking toilets.
3. The wax ring is already compressed. A wax ring that has been in place for years has settled into its current shape. Any disturbance to the floor around the toilet, including chipping out old tile and the vibration from installation work, can break that seal even if the toilet itself never moves.
4. The finish quality shows. Uneven grout lines, visible caulk smears around the toilet base, and tile cuts that do not match the rest of the floor are the giveaways that a tile job was rushed. These show up in real estate photos, home inspections, and your daily view of your own bathroom.
 1")
What Proper Bathroom Tile Replacement Looks Like
When DWR Interiors replaces a bathroom floor, the process is standard across every Houston-area project:
- Disconnect the water supply and remove the toilet
- Demo old tile and inspect the subfloor for water damage, soft spots, or rot
- Repair or replace subfloor as needed
- Install cement backer board where required
- Set new tile across the full floor, including under the toilet location, up to the flange
- Grout and seal
- Reset the toilet on a new wax ring with the flange at the correct height
- Caulk the toilet base with mildew-resistant silicone
This is the order of operations every licensed plumber and remodeling professional follows. Skipping the toilet removal step is the most common reason bathroom tile jobs fail within a year or two of installation.
Houston Humidity Makes This More Important, Not Less
Bathrooms in Spring, The Woodlands, Conroe, and the broader Houston metro deal with humidity levels that regularly sit above 70 percent for months at a time. That moisture environment punishes any shortcut in a tile installation. Gaps around a toilet base that might survive in a drier climate will absorb water, grow mold, and rot a subfloor in this region.
If your bathroom also has poor ventilation, the problem compounds quickly. Replacing tile is a good moment to evaluate the exhaust fan and make sure it is sized for the room. Our guide on [how to fix a poorly ventilated bathroom] walks through seven solutions for bathrooms that hold moisture too long after showers.
What About Cement Board Under the Tile?
If your tile project extends into the shower or tub surround, cement board is the required substrate in most Texas municipalities. Cement board (such as Durock or HardieBacker) handles moisture far better than standard drywall or green board, which matters in every Houston-area bathroom.
For shower walls, cement board is installed over studs with corrosion-resistant screws, seams taped with alkali-resistant mesh tape, and the entire surface waterproofed with a liquid or sheet membrane before tile goes on. Our full guide on [cement board for showers: sizing, install, and waterproofing] covers the process in detail.
Best Tile Materials for Houston-Area Bathrooms
Houston’s heat, humidity, and hard water put real demands on bathroom tile. Here is how the common options perform:
| Material | Moisture Resistance | Durability | Best Use |
|---|---|---|---|
| Porcelain | Excellent (< 0.5% absorption) | High | Floors, shower walls, wet areas |
| Ceramic | Good (3-7% absorption) | Moderate | Walls, backsplash, low-traffic floors |
| Natural stone (marble, travertine) | Moderate (requires sealing) | High | Accent walls, vanity tops |
| Glass mosaic | Excellent | Moderate | Shower niches, accent strips |
Porcelain tile is the standard recommendation for bathroom floors across Spring, The Woodlands, and greater Houston because its near-zero absorption rate handles the local climate. Pair it with thinset rated for porcelain and an epoxy or urethane grout for the longest service life.
If you are also evaluating bathtub options during your remodel, our comparison of [what bathtubs are made of] breaks down acrylic, cast iron, fiberglass, porcelain-on-steel, and solid surface options for Houston water conditions.
FAQ: Bathroom Tile Replacement
Q: Can I replace one cracked tile without removing the toilet?
A: Yes, if the cracked tile is not adjacent to the toilet base and the repair does not require disturbing the surrounding tile or subfloor. A single-tile repair near the vanity or in the open floor area can be done without removing the toilet.
Q: Can I tile over existing bathroom floor tile?
A: In some cases, but only if the existing tile is well-bonded, level, and the added height does not create transition problems at the doorway or interfere with the toilet flange height. For most projects, removing the old tile is the right call.
Q: Why does the toilet have to come out for a full tile replacement?
A: Because tile must run continuously underneath the toilet base, and the flange height must match the new finished floor. Both of those requirements are impossible to meet with the toilet in place.
Q: Will removing the toilet damage my plumbing?
A: No. Removing and resetting a toilet is a routine part of bathroom tile work. A new wax ring is installed during the reset, which actually improves the seal compared to leaving an old ring in place.
Q: How long does a bathroom floor tile replacement take?
A: For a standard bathroom floor with the toilet removed, plan on one to two days for demo and installation, plus a day for grout to cure before the toilet is reset and the bathroom is back in service.
Getting Professional Help for Tile Replacement
While DIY tile replacement is possible, working with professional Bathroom remodeling contractors in Spring can ensure the job is done correctly. Professionals have the tools, experience, and knowledge to remove old tiles, install new ones, and handle any plumbing concerns that may arise.
If you’re planning a larger bathroom renovation, it may be worth considering a full upgrade, including new fixtures and updated plumbing. To learn more about the potential costs of extensive remodeling, check out our blog on What is the most expensive part of a bathroom remodel?.
Planning a bathroom tile replacement or full bathroom remodel? DWR Interiors handles every step the right way, including the parts a DIY guide will tell you to skip. Serving Spring, The Woodlands, Conroe, Magnolia, Tomball, and greater Houston. Call 281-419-4144 or [request a free consultation by clicking here]
DWR Interiors | Spring, TX | Interior Remodeling Contractor